Some of the ways: Double-click and Drag-and-Drop
In another post I told how I make use of a variety of photo post-processing apps on my laptop.

I keep shortcut icons to the apps, some full-fledged photo editors, some old plugins, and some current incarnations of plugins. You can see some in the illustration here.
Before going into some of the details and some of the gotchas, come with me back into the dark ages. Long before Windows was developed conventions had been adopted on how to start programs, that’s what apps were called then, and how to have them work on files. Those details I remember only faintly and they don’t matter much, but much of those conventions survive to this day, deep “underneath” what you see nowadays.
Back then the only way was “command line” operation. You needed to write text instructions to make the computer do something. Actually that still can be done today. Just type cmd into your “Type here to search” box.

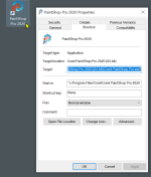
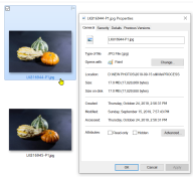
Click on Command Prompt and presto a window comes up that looks just like a computer monitor four decades ago. Type in the full path to the app you wish to start. Where can you get that? Right-click on the shortcut and click Properties. The path will already be highlighted and you can copy it. If you want the app to start working on a photo, get its path. That is bit more complicated. Right-click on the thumbnail, here in Photo Gallery, click Properties, the the General tab. The first part of the path is in the Location box, you need to append a back-slash and the file name that is shown toward the top of Properties. Surround the full path in quotes so the command processor will not be confused by any spaces in that text.
Now put all that into the Command Prompt window. You can paste it in, a small nod to modern ways. It will look like this:

Okay, okay, nobody does this nowadays, but it works and opens the app with the photo specified. In this case PaintShop Pro. It works just fine.
 But it is so much easier to just click down and hold on the photo and drag it over to the shortcut icon for the app. Windows shows “Open with …” and the name of the app. Just release the mouse button and you are on your way.
This work for “well-behaved” apps that follow the old conventions. Most do, but care is required, there are gotchas!
Using plugins on the desktop
Conventional plugins designed to work from inside a host photo editor can be launched with the drag-and-drop procedure. The plugin runs just the way it does when launched from inside an editor. It starts with the photo dragged in. You can use it normally. When you click the accept or ok icon it will overwrite the photo with the changes. Yep, you read that right, overwrite!
When using this approach always make a copy of the photo first and work with the copy only. This method is fast and easy, but you must be careful and never use the original photo file!
Stand-alone apps
Most specialty editors work just like I described for plugins above, but they may or may not overwrite the photo dragged in. So use caution and find out how yours works!
Stand-alone apps can be launched by double-clicking the shortcut icon. They then typically ask for you to drag in a photo or to select it via the open file process.
Some will look different for the two opening methods. Like shown here.
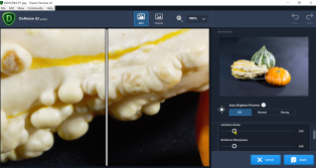
The example here is Topaz DeNoise AI. On the left is how it looks when opened with drag-and-drop. Note the lower right shows an Apply button. It really does! The dragged in image will be overwritten with the effects you selected.
The right illustration shows the same app opened by double-clicking the shortcut icon. It ask for an image to be dragged in (or opened manually). The button on the lower right is Save As.
One final warning: Always make a copy or conversion of your photo that you imported from your camera. Never use the original.
 .:. © 2019 Ludwig Keck


Pingback: December 27th 2019 – Weekly Roundup of Members Posts | Blogging Meetup